Making a Simple ERC20 Token
In this blog post, I’ll walk through creating a simple ERC20 token on Ethereum. This was one of my lab assignments this semester, and I thought I better make a blog post about this, because I want to write consistently over here why not?
A token in general is basically simply a digital representation of potentially anything. For example, a token can represent:
reputation points in an online platform
skills of a character in a game
lottery tickets
financial assets like a share in a company
a fiat currency like USD
an ounce of gold
A token can also represent access rights to a blockchain or blockchain app, and tokens can also be used to automate "friction points" in various industries.
Utility tokens, are tokens that have a specific "use" on the blockchain or an app based on that. Utility tokens are also called "app coins" because they are explicitly designed for a certain app or blockchain.
ERC20 Standard
The ERC-20 (Ethereum Request for Comments 20), proposed by Fabian Vogelsteller in November 2015, is a Token Standard that implements an API for tokens within Smart Contracts. The motivation for this EIP was to make "a standard interface allows any tokens on Ethereum to be re-used by other applications: from wallets to decentralized exchanges."
It provides functionalities like transfering tokens from one account to another, to get the current token balance of an account and also the total supply of the token available on the network. Besides these it can allow an owner of some tokens to approve spending those tokens by a third party account.
Methods and Events Defined in ERC20
| |
The
name,symbol,decimalsare state constants that identify the ERC20 token and the number of decimal places used for user representation.The
totalSupplyfunction returns the total supply of the ERC20 token.The
balanceOffunction returns the balance of the address passed as a argument.The
transferfunction transfers specified number of tokens from the sender to the specified receiver, provided the sender has sufficient balance.The
approvefunction is used by the owner of some tokens (specified by the_fromargument) to approve a delegate account to withdraw and spend some allowed number of tokens.The
allowancefunction returns the current approved number of tokens by an owner to a specific delegate, as set in the approve function.The
transferFromfunction allows a delegate approved for withdrawal to transfer owner funds, provided the funds specified are less than or equal to the allowance of the delegate, and less than or equal to the owner’s balance.
For our implementation of the ERC20 token, we add some features apart from the standard:
The
burnfunction allows the sender to burn some specified number of tokens, provided they have sufficient balance. Successful burning of tokens emits aTransferevent to address 0x000...000.The
burnFromfunction allows a delegate to burn some specified number of tokens from an account they have sufficient allowance from. Successful burning of tokens emits aTransferevent to address 0x000...000.The
isMinterfunction allows anyone to check if the specified address has minting privileges (or has the minter role).The
addMinterfunction allows the creator of the token to add an address as a minter. Successful addition emits aMinterAddedevent.The
removeMinterfunction allows the creator of the token to remove an address from the minter role. Successful removal emits aMinterRemovedevent.The
renouncefunction allows a minter to renounce their minting privileges. Successful renunciation emits aMinterRemovedevent.The
mintfunction allows a minter to mint an arbitrary amount of tokens and take ownership of those tokens. Successful minting emits aTransferevent with 0x000...000 as the from address.The
_isMintermapping maintains a mapping to identify whether an address has minting privileges or not.
Implementation
We make this contract in Solidity, and a simple way to start writing Ethereum contracts in Solidity is to use the Remix IDE It’s browser-based, no setup required.
Token Contract
| |
Token Vendor Contract
To allow buying and selling tokens (for ether), we create a Vendor contract, that allows buyers and sellers of the tokens to call functions for the same.
The payable
buyTokensfunction allows the sender to send some ether in exchange for tokens.The
sellTokensfunction allows the sender to sell the tokens for ether. Successful sale of tokens will require that the sender has delegated a minimum of that amount of tokens to the contract account using theapprovefunction defined in the token contract, so that the Vendor contract can transfer the specified number of tokens on the sender’s behalf.
| |
We define arithmetic operations explicitly to secure our ERC20 Token
from integer overflow attacks. We check for integer overflows while
performing these operations. This logic is implemented in a separate
library called SafeMath.
| |
Execution
The following steps show how the contracts can be deployed, following a demonstration of the different functionalities coded in the contracts. We run a local Geth client running a private blockchain, and use the Remix IDE to call the contracts.
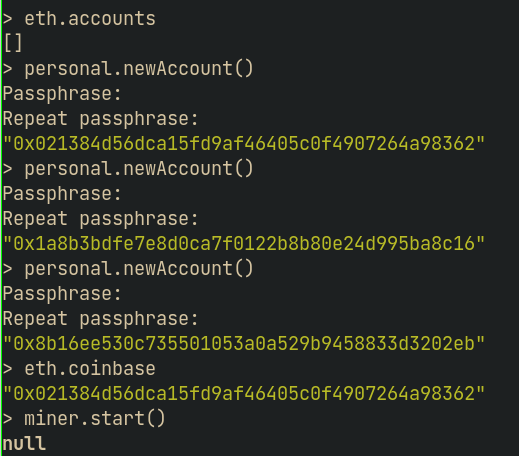
First, we initialize a local test ethereum network using the genesis block given below, and start the node, allowing RPC CORS from Remix. Attach a console to the running geth client via IPC. Create three accounts, and start mining with one so that we can deploy a contract using that account.
1 2 3 4 5 6 7 8 9 10 11 12 13 14 15 16 17 18 19 20 21 22 23{ "config": { "chainId": 2021, "homesteadBlock": 0, "eip150Block": 0, "eip150Hash": "0x0000000000000000000000000000000000000000000000000000000000000000", "eip155Block": 0, "eip158Block": 0, "byzantiumBlock": 0, "constantinopleBlock": 0, "petersburgBlock": 0, "istanbulBlock": 0 }, "nonce": "0x0000000000000042", "timestamp": "0x00", "parentHash": "0x0000000000000000000000000000000000000000000000000000000000000000", "extraData": "0x00", "gasLimit": "0x4c4b40", "difficulty": "0x0004", "mixhash": "0x0000000000000000000000000000000000000000000000000000000000000000", "coinbase": "0x0000000000000000000000000000000000000000", "alloc": {} }1 2 3$ geth --datadir .ethereum/net init genesis.json $ geth --rpc --rpccorsdomain "https://remix.ethereum.org" --datadir .ethereum/net --allow-insecure-unlock $ geth attach ipc:<DATADIR>/geth.ipc
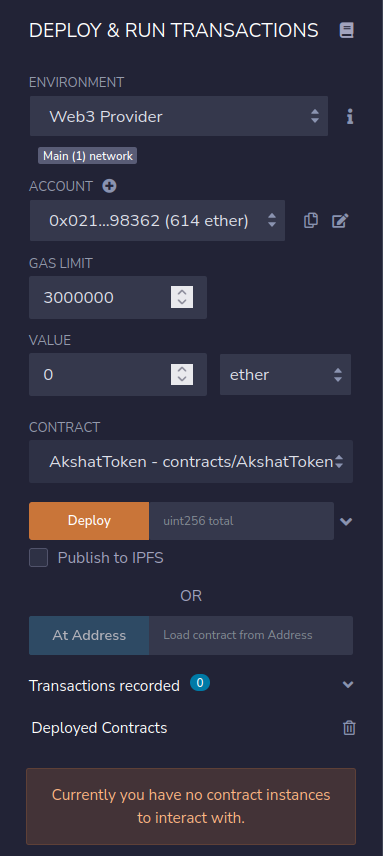
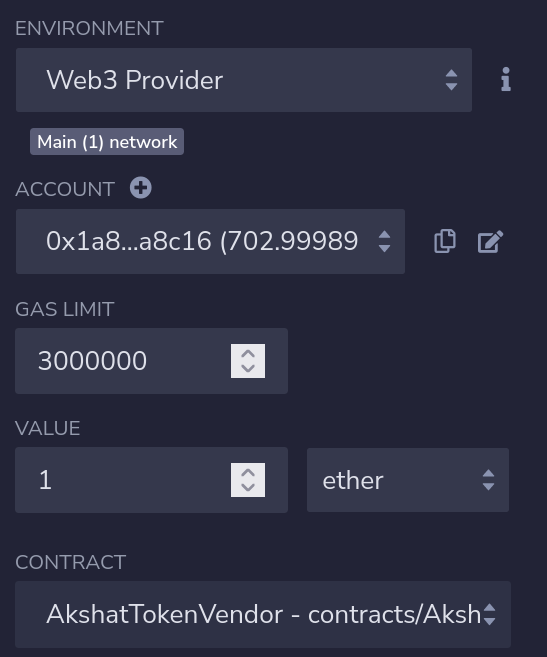
Initializing the local test ethereum network 1 2> personal.newAccount() // to create an account > miner.start() // to start miningCreate accounts and start mining In Remix IDE, switch to the Deploy & run transactions window. Select Web3 Provider as the Environment. When the Remix IDE connects to the Geth client, the three addresses should be visible in the Account input.
Remix IDE connected to local test network We can now deploy the contract by selecting the contract, providing the
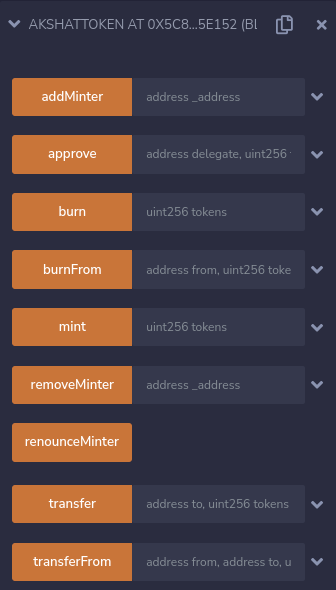
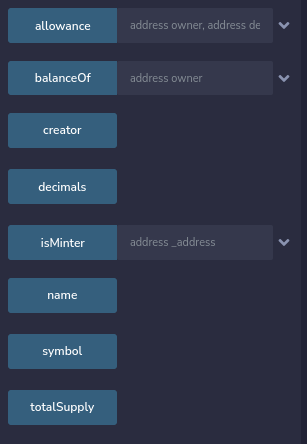
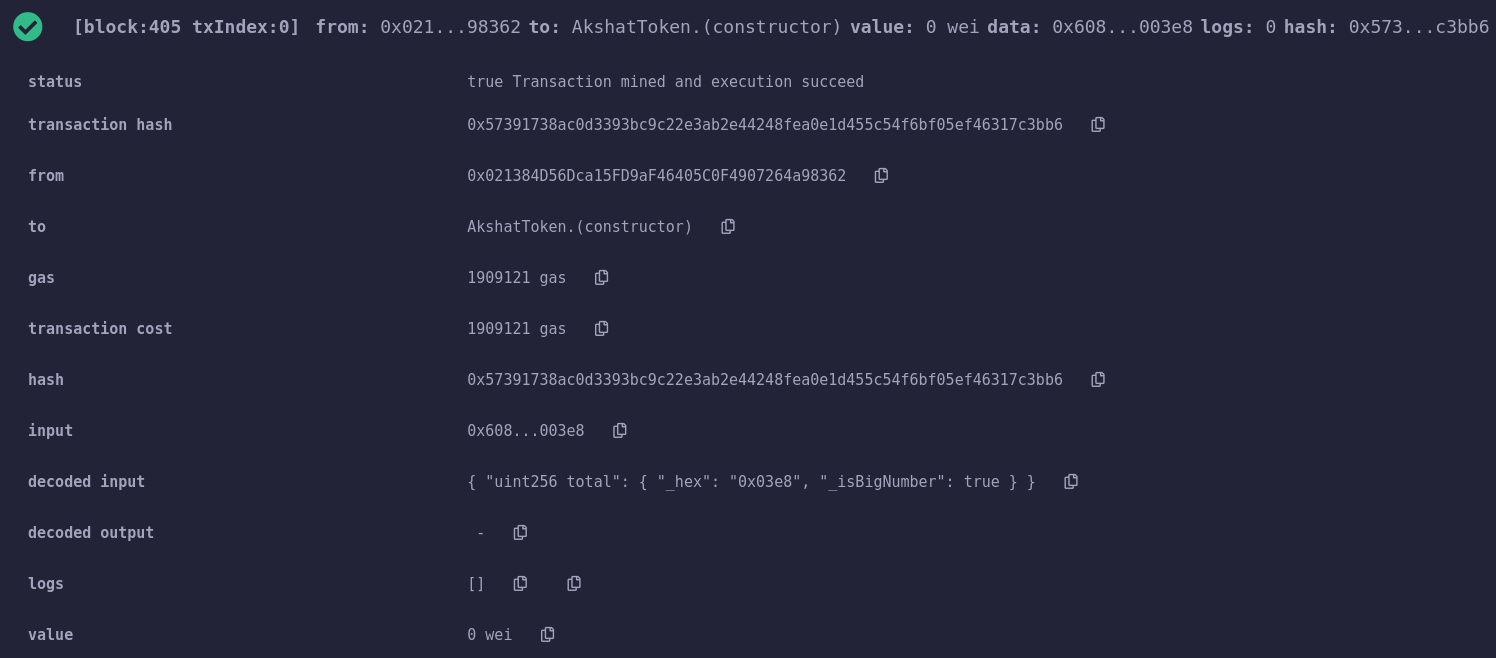
totalargument. We select 1000 tokens as the initial supply. Unlock an account which has some ether using the geth console by runningpersonal. unlockAccount(eth.accounts[0]). Click on Deploy. After we deploy the contract, the contract will appear under Deployed Contracts, with functions available to use.The Token Contract, deployed The Token Contract, deployed. These are the view functions. Transaction receipt of deploying the contract Try running the different view functions first, and check whether the output is as expected. For example, the
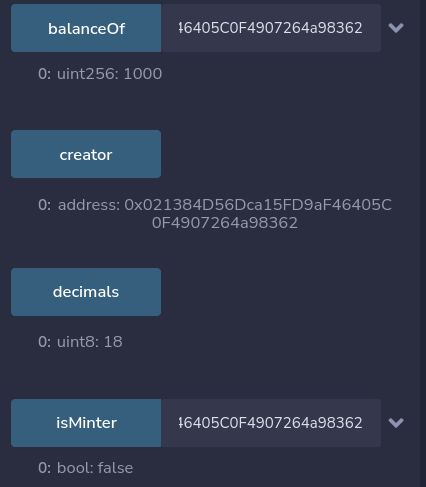
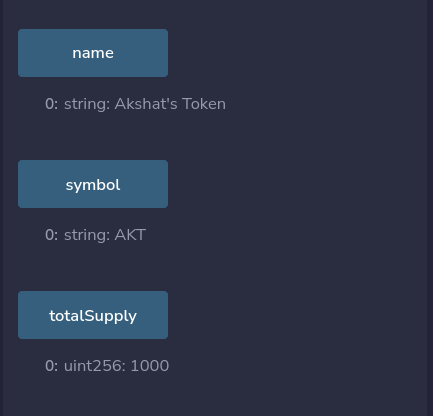
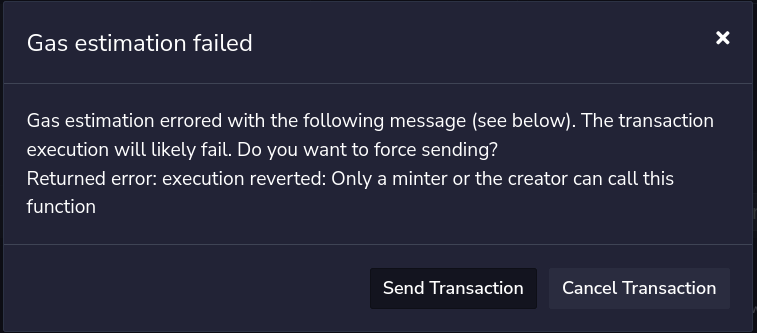
balanceOffunction with the contract creator’s address should return 1000 tokens initially. Thename,symbol,decimals,creatorandisMinterfunctions should similarly return expected values.The view functions return values as expected The view functions return values as expected If we try minting from the second account, an error will be returned, since the second account does not have minting privileges.
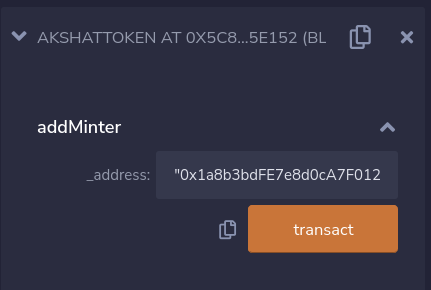
Trying to mint from an address that does not have minting privileges. Remix shows the require error while gas estimation. Now we can try adding the second account as a minter using the
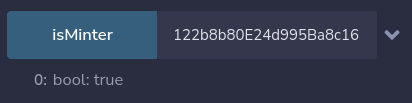
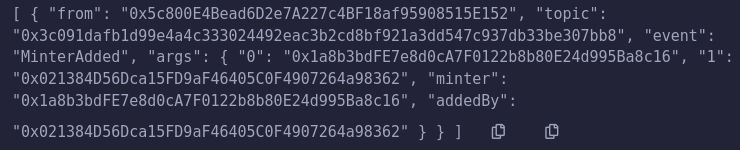
addMintermethod from the creator’s account.Call to addMinterfunction specifying addressChecking if the address now has minter privileges returns true MinterAddedevent emitted, specifying who added whom as a minterIf we now call the
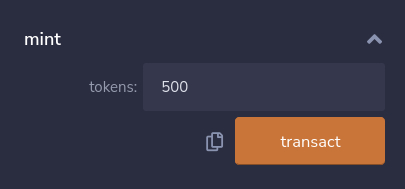
isMintermethod from the second account, we’ll get true as the return value.We can try minting some tokens from the second account by (first changing the account in Remix) calling
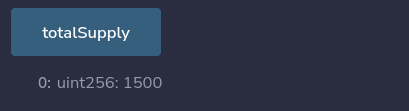
mintmethod.Call to mintfunctionTransfer event of 500 tokens from 0x000...000New balance of minter New total supply of tokens We can transfer tokens from second account to third account by calling the
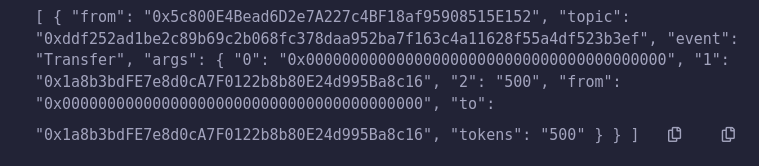
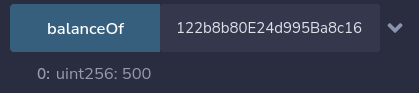
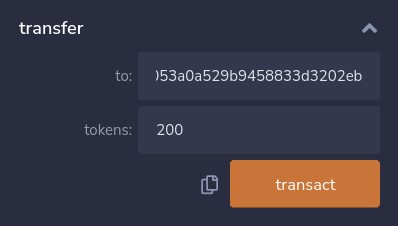
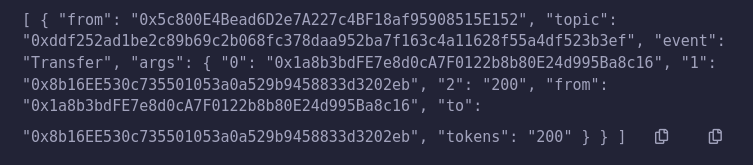
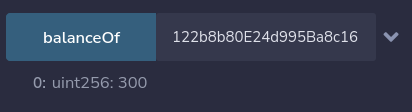
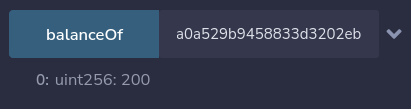
transfermethod from the second account.Call to transferfunctionTransfer event of 200 tokens with from and to addresses New balance of sender (500 → 300) New balance of receiver (0 → 200) Let’s approve the third account for delegation of 50 tokens by calling the
approvemethod from the second account. We can then check the allowance by calling theallowancemethod.

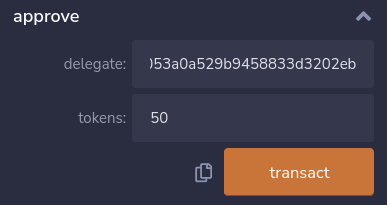
approve function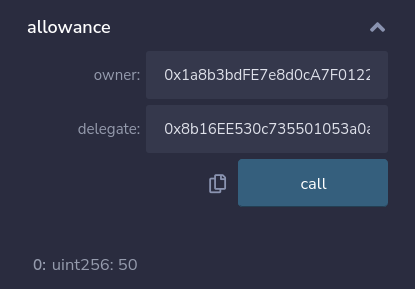
allowance function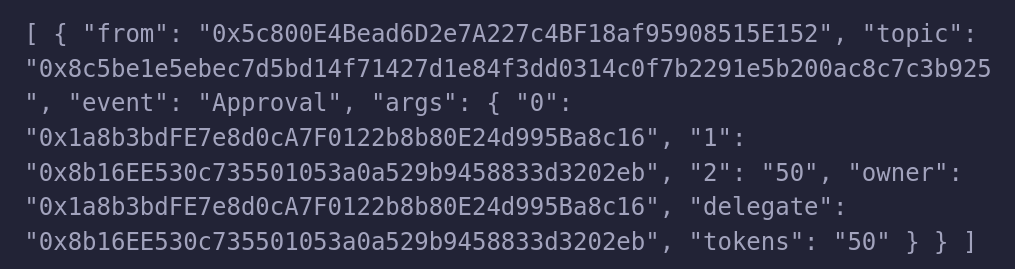
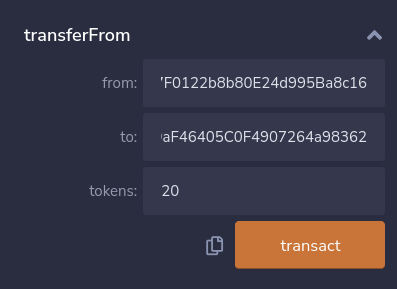
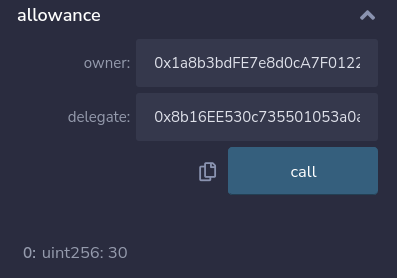
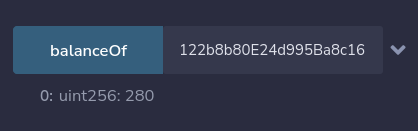
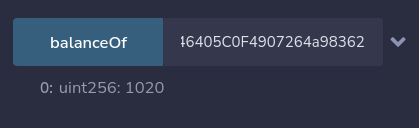
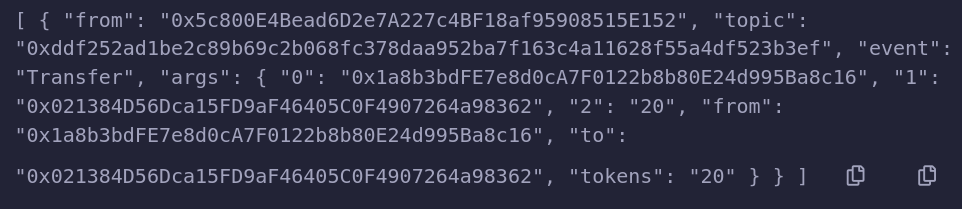
Let’s transfer 20 tokens belonging to the second address to the first address from by calling
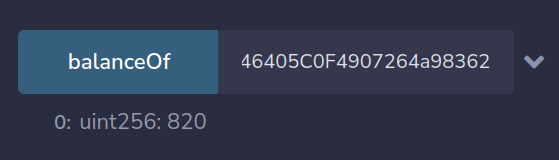
transferFrommethod from the third account.Call to transferFromfunctionUpdated allowance from 0x1a8b3bto0x08b16E(50 → 30)Updated balance of sender 0x1a8b3bUpdated balance of receiver 0x02138(1000 → 1020)Transfer Event with from, to and tokens transferred Let’s burn 200 tokens from creator’s account.
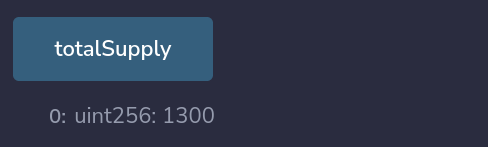
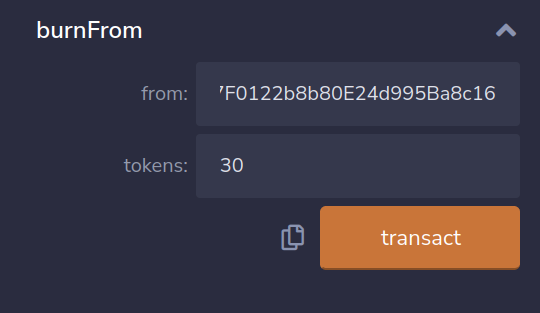
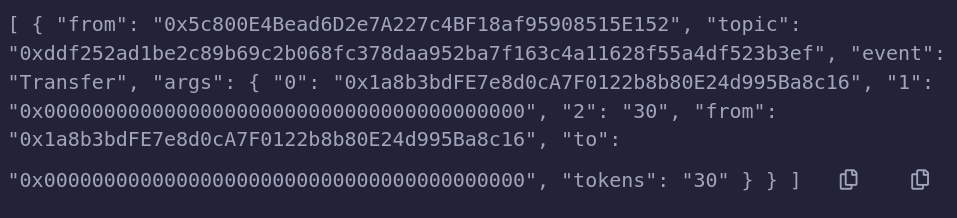
Call to burnfunction with 200 tokensUpdated balance of account (1020 → 820) Updated total supply (1500 → 1300) Transfer Event of 200 tokens to address 0x000…000 Let’s burn the remaining 30 tokens from the allowance delegated from second address to the third address.
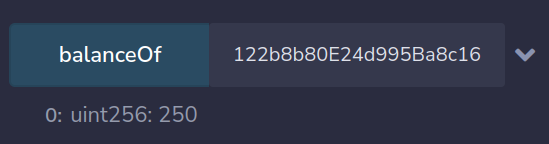
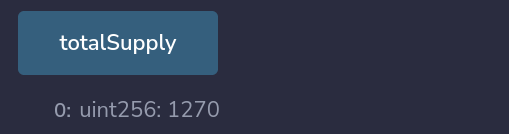
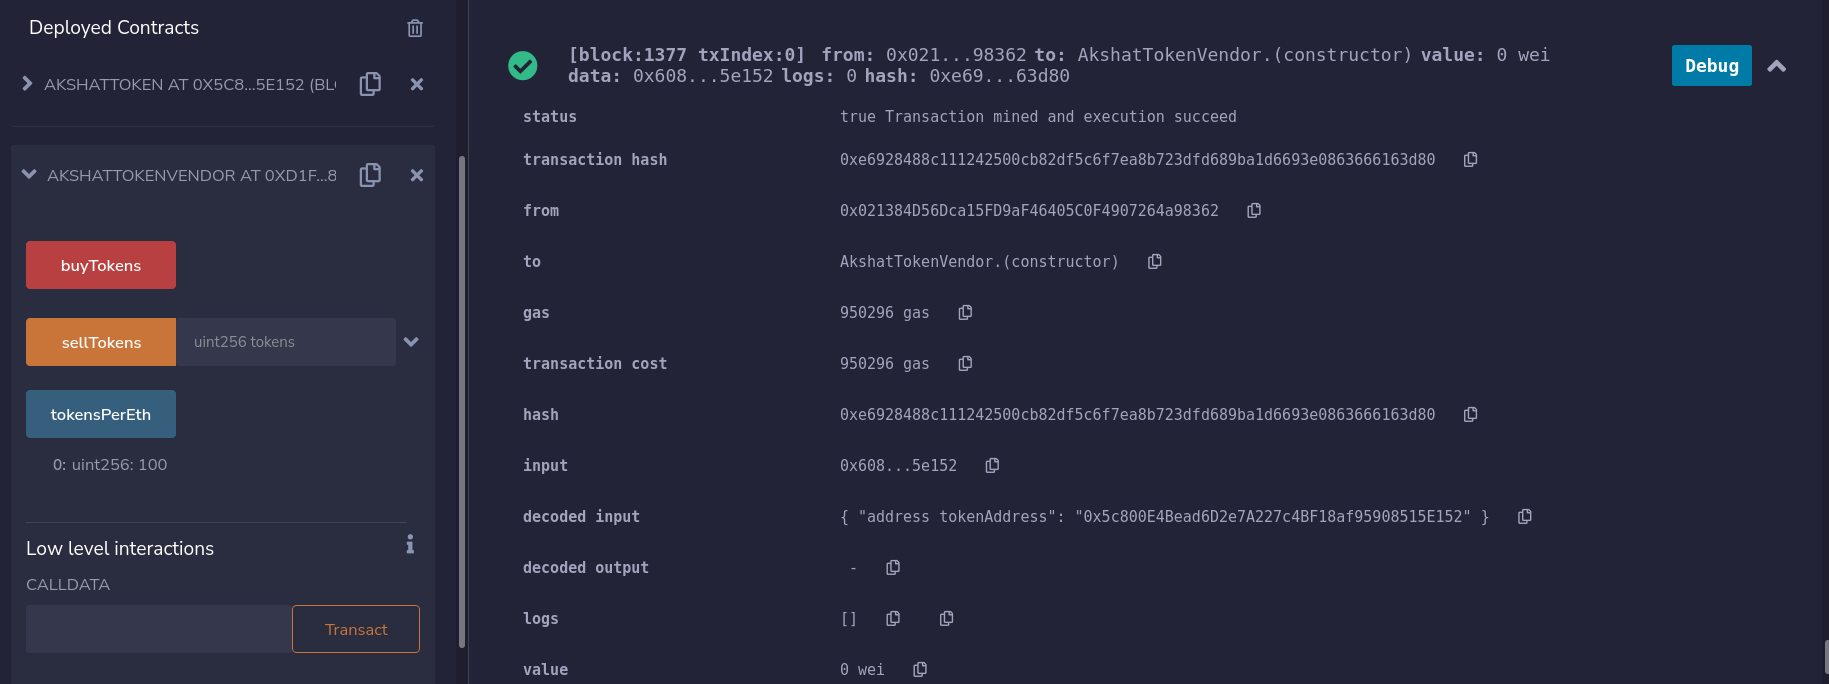
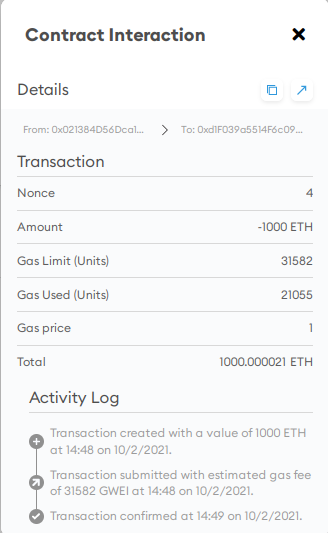
Call to burnFromfunction with 30 tokens, delegated from 0x1a8b3b to 0x08b16EUpdated balance of account 0x1a8b3b(280 →250)Updated total supply (1300 → 1270) Transfer Event of 30 tokens to address 0x000...000Now let’s deploy the Token Vendor contract in the same manner as we deployed the Token contract. We will create the vendor contract from the creator address again, and then send some ether to the contract (using Metamask, any other wallet or even the geth console) for its funds, so that it can buy tokens from some address who sells tokens to it for ether. Select the token vendor contract and deploy it, with the address of the token contract as a parameter to the constructor.
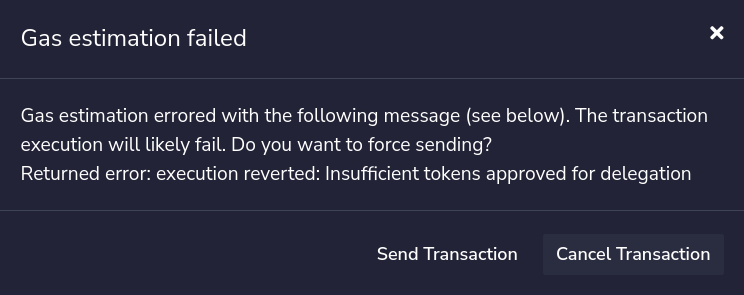
Deploying the Token Vendor contract. The functions available to call are shown on the left Sending 1000 ETH to the Vendor contract using Metamask If we now try selling some tokens to the contract, we will get an error, since we first have to delegate that amount of tokens to the Vendor contract to allow it to transfer those tokens to itself. Hence, first approve some amount of tokens to the vendor contract, and then call the
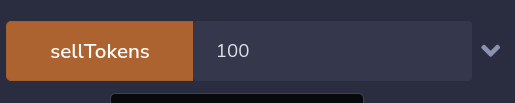
sellTokensfunction with some tokens less than or equal to the allowance.Trying to sell tokens without approval of those tokens to the vendor contract After approving the vendor contract, we can successfully sell tokens. The image below shows the second account selling 100 tokens, for which it gets back 1ETH, since the exchange rate (defined as a constant) is 100 tokens per ether.
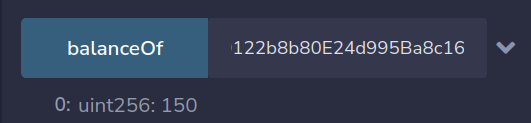
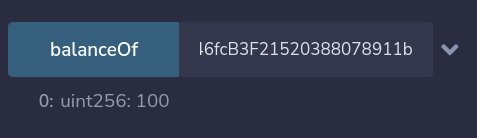
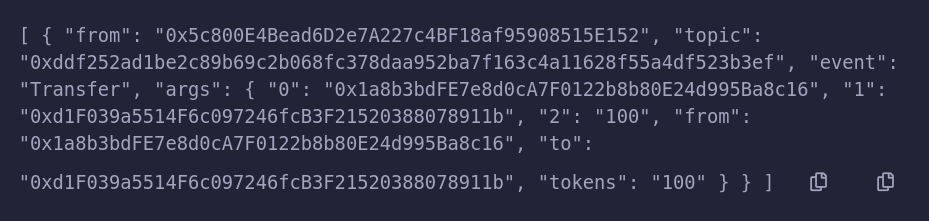
Call to sellTokensfunction with 100 tokensUpdated balance of account 0x1a8b3b(250 → 150)Updated balance of vendor contract (0 → 100) Transfer Event of 100 tokens For buying tokens, we simply need to call the
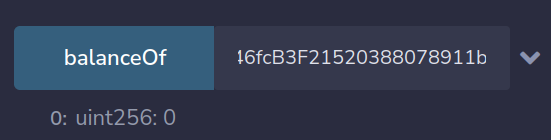
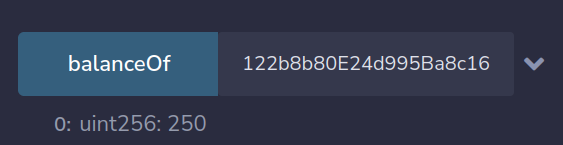
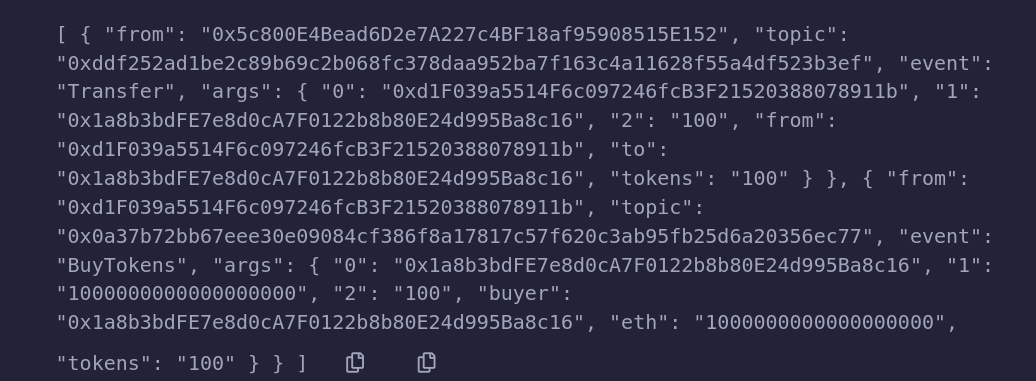
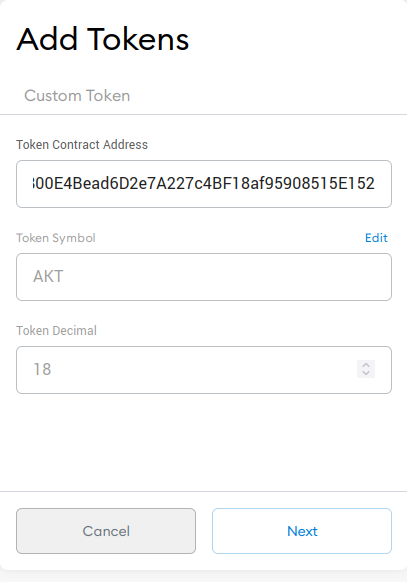
buyTokensfunction and send some ether along with it. According to the token exchange rate, some number of tokens will be bought.Call to buyTokensfunction with 1 ether valueUpdated balance of vendor contract (100 → 0) Updated balance of buyer 0x1a8b3b(150 → 250)Transfer Event of 100 tokens We can also use a wallet like Metamask to deal with ERC20 tokens. Click on Add Token in Metamask. Fill in the token address, and Metamask will retrieve the symbol and decimals of the token. Click on Next and then Add Token.
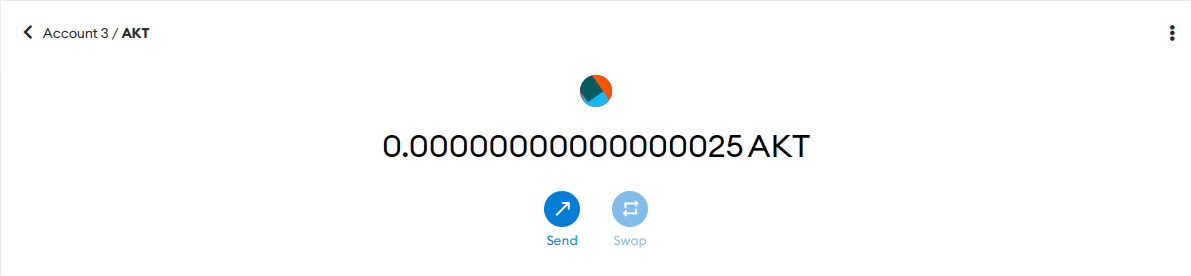
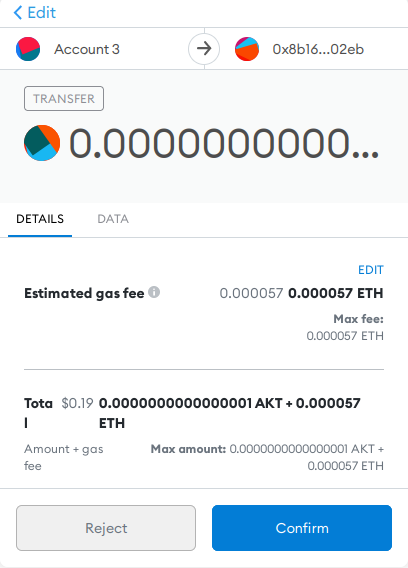
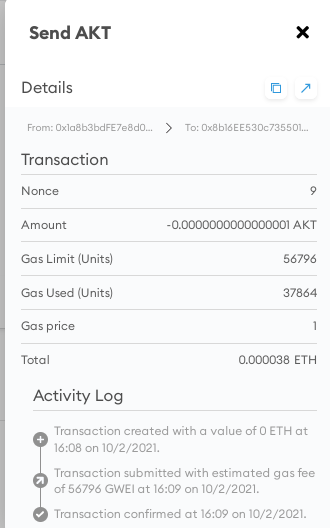
Adding the AKT token in Metamask Balance of AKT in an account. The representation is 18 decimal places Transferring AKT tokens using Metamask Transfer Event of 100 tokens


Conclusion
We saw how an Ethereum smart contract can be used to implement a fungible token using the ERC20 standard, along with some extensions to allow burning and minting tokens. Then, we developed a Vendor contract to allow users to buy and sell tokens. Remix IDE was used to develop and test the contracts, Geth client was used to simulate a test blockchain locally, and Remix and Metamask was used to deal with tokens.
ERC20 is somewhat limited by its simplicity, even though we added on the minting and burning functions. A newer standard for fungible tokens, ERC777 (EIP) has a lot more functionality, and is backward compatible with ERC20. For non-fungible tokens, there’s the ERC721 standard, often used for collectibles and games.